Are you ready to take your video editing skills to the next level? Look no further than Final Cut Pro X's powerful color grading feature. In this step-by-step guide, we will show you how to master the art of color grading in Final Cut Pro X and add a professional touch to your videos.
Color grading is an essential part of the post-production process that can greatly enhance the visual appeal and emotional impact of your videos. With Final Cut Pro X, you have a wide range of tools and options at your disposal to manipulate colors, adjust contrast, and create stunning visuals.
Whether you're a beginner or an experienced editor, this comprehensive guide will walk you through every step of the color grading process. From understanding the basics of color theory to advanced techniques like skin tone correction and creating a consistent look, we've got you covered.
So grab your copy of Final Cut Pro X and get ready to transform your videos with the power of color grading. Let's dive in and unlock the true potential of your footage.
Color grading is an essential part of the post-production process that can greatly enhance the visual appeal and emotional impact of your videos. It allows you to manipulate colors, adjust contrast, and create stunning visuals that captivate your audience.
When done right, color grading can help you establish a specific mood or atmosphere, enhance storytelling, and create a consistent look throughout your video. It can transform a dull and flat footage into a vibrant and cinematic masterpiece.

Before diving into the world of color grading, it's important to have a basic understanding of color theory. Colors evoke different emotions and can convey specific messages. By understanding color relationships and their psychological impact, you can make intentional color choices that support the narrative of your video.
The color wheel is a useful tool that helps you understand the relationships between primary, secondary, and tertiary colors. It consists of twelve hues arranged in a circle, with warm colors on one side and cool colors on the other. By understanding the basics of color harmony and contrast, you can create visually pleasing and balanced color grades.
Before you start color grading your footage, it's crucial to ensure that your footage is properly prepared. This includes organizing your clips, adjusting exposure, and white balance correction.
Organizing your clips in a logical manner will save you time and make the color grading process more efficient. You can create folders or keywords to categorize your clips based on scenes, locations, or any other criteria that make sense for your project.
Exposure adjustment is essential for achieving a balanced and natural-looking image. Pay attention to the highlights and shadows in your footage, making sure that no details are lost or clipped.
White balance correction is necessary to eliminate any color casts caused by different lighting conditions. Use the white balance tools in Final Cut Pro X to neutralize the colors and ensure accurate representation of the scene.
Final Cut Pro X offers a wide range of tools and techniques for color grading. Understanding these tools and how to use them effectively will empower you to create the desired look for your videos.
The color board is the primary tool for making color adjustments in Final Cut Pro X. It allows you to control the overall color balance, exposure, saturation, and contrast of your footage. By manipulating the color wheels and sliders, you can fine-tune the highlights, shadows, and midtones of your video.
Secondary color correction is another powerful feature in Final Cut Pro X that allows you to isolate specific colors or areas in your footage for targeted adjustments. This technique is particularly useful when you want to enhance or change the color of a specific object or correct skin tones.
Additionally, Final Cut Pro X provides numerous built-in effects, such as color presets, film looks, and creative filters, that can be used to quickly achieve a specific visual style or mood. Experimenting with these effects and combining them with other color grading techniques can help you create unique and captivating visuals.
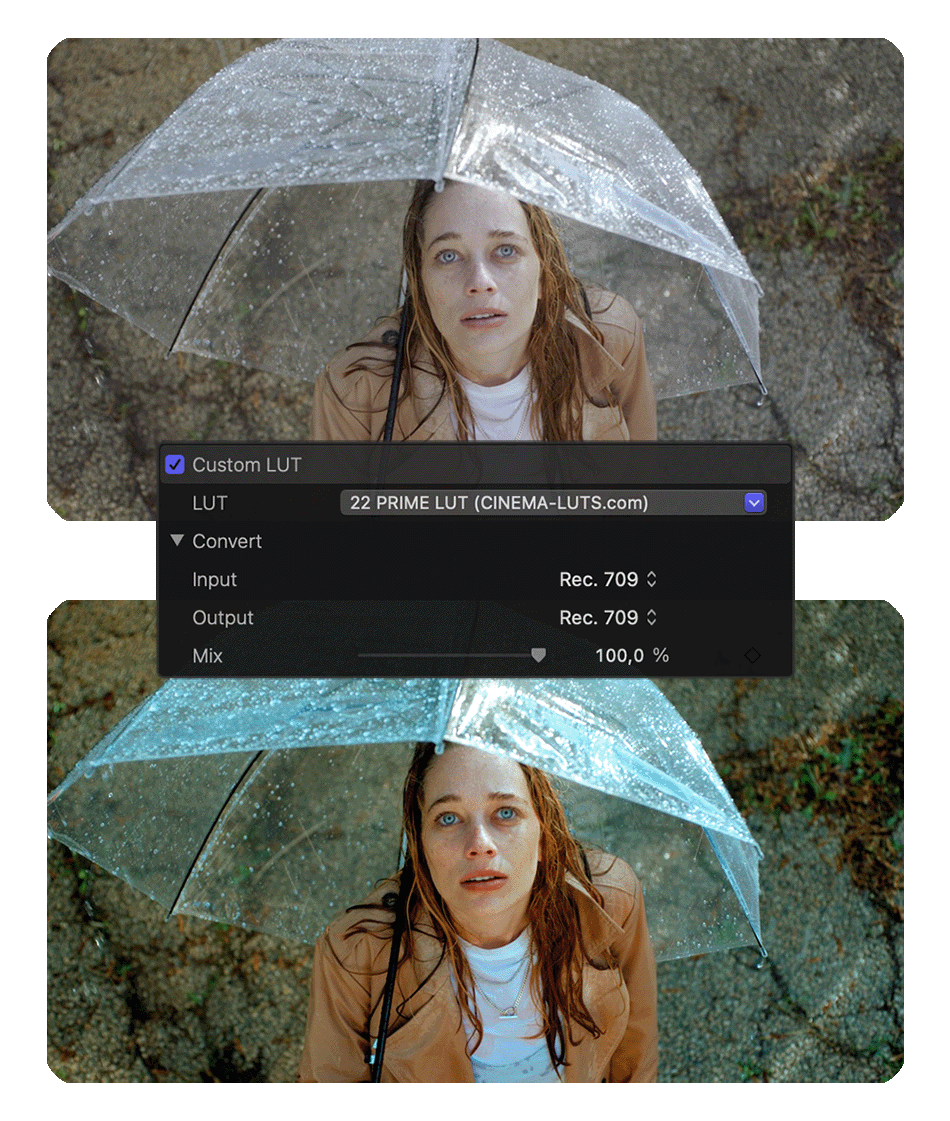
 LUTs (Look-Up Tables) are an invaluable tool for color grading in Final Cut Pro X. LUTs are essentially mathematical formulas that map input colors to output colors. They allow you to quickly apply a specific color grade or look to your footage with a single click.
There are many LUTs available online, both free and paid, that can be easily imported into Final Cut Pro X. These LUTs are created by professional colorists and filmmakers and can help you achieve a variety of looks, from vintage film aesthetics to modern cinematic styles.
By using LUTs in combination with other color grading techniques, you can save time and achieve consistent results across multiple clips or projects. Experiment with different LUTs and adjust their intensity to create the desired look for your video.
Once you have mastered the basics of color grading, you can take your skills to the next level with advanced techniques in Final Cut Pro X.
One advanced technique is skin tone correction. Skin tones are particularly important in video production, as they can greatly impact the overall look and feel of a scene. Final Cut Pro X provides dedicated tools for skin tone correction, allowing you to adjust hue, saturation, and luminance of specific skin tones without affecting the rest of the image.
Another advanced technique is creating a consistent look across multiple clips. This is especially useful when working on a project that requires a consistent visual style or when editing footage from different sources. Final Cut Pro X offers features like compound clips and adjustment layers that allow you to apply color grades and effects to multiple clips simultaneously, ensuring a cohesive look throughout your video.
Achieving a consistent color grade across multiple clips can be challenging, but with the right techniques and attention to detail, it is achievable.
First, establish a reference shot or look that you want to achieve for your video. This can be a still image or a short clip that represents the desired color grade. Use this reference throughout the color grading process to ensure consistency.
Second, pay attention to color continuity. Make sure that colors match from shot to shot, especially when cutting between different angles or scenes. Adjust the color wheels and sliders in Final Cut Pro X to match the overall color balance and tone of the reference shot.
Third, use adjustment layers or compound clips to apply the same color grade or effect to multiple clips. This will save you time and ensure a consistent look across your video. Adjust the opacity or intensity of the adjustment layers to fine-tune the overall look.
Once you have completed the color grading process, it's time to export and share your video. Final Cut Pro X offers various export options to suit your needs.

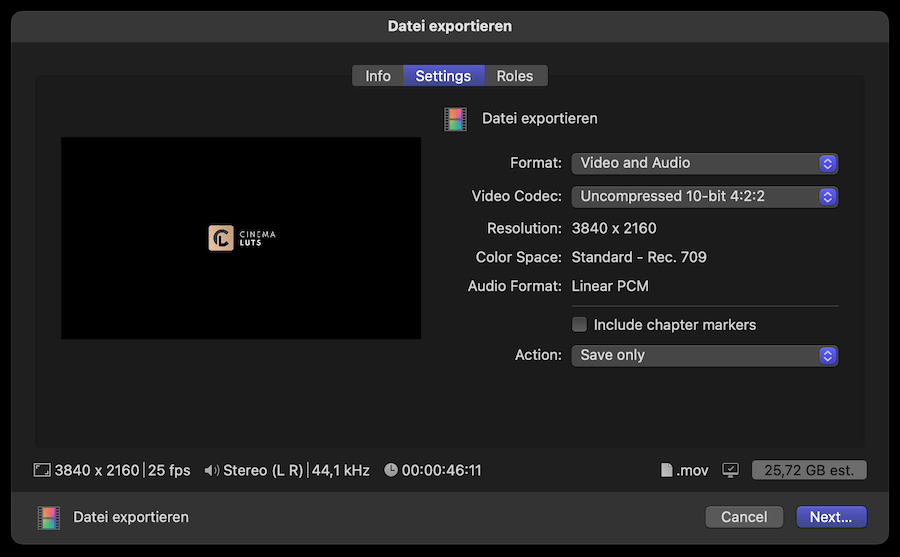
To export your color graded video, go to the File menu and select Share. From there, you can choose different output formats, resolutions, and compression settings. Consider the platform or medium where your video will be viewed and adjust the settings accordingly.
Final Cut Pro X also provides options for sharing directly to popular video sharing platforms like YouTube and Vimeo. This allows you to quickly upload your color graded video and share it with your audience.
Color grading is a powerful tool that can elevate the visual quality of your videos and make them more engaging and impactful. By mastering the art of color grading in Final Cut Pro X, you have the ability to transform your footage and tell your story with style.
In this comprehensive guide, we have covered the importance of color grading, the basics of color theory, preparing your footage, color grading tools and techniques in Final Cut Pro X, using LUTs, advanced color grading techniques, achieving a consistent color grade across multiple clips, and exporting and sharing your color graded video.
Now it's time to apply these techniques and unleash your creativity. Experiment with different color grades, try new techniques, and don't be afraid to push the boundaries. With practice and patience, you will become a master of color grading in Final Cut Pro X. So grab your copy of Final Cut Pro X and let's dive in and unlock the true potential of your footage.

CINEMA LUTS VOL. 1
Turn your footage into cinematic masterpieces with our 1-Click solution LUTs. Over 30 handcrafted presets are waiting for you!
Free Tools
LUT Converter (65 to 33)
© cinema-luts.com
Imprint - Privacy Policy - Cookies - Blog